Comments
 Volvo Ocean Race - Southern Ocean Sailing in the Southern Ocean in Summer is a tough old gig, even for the pros on The Volvo Ocean Race. It seems no coincidence that so many use the Le Chameau Neptune boot for the really tough, cold race legs.
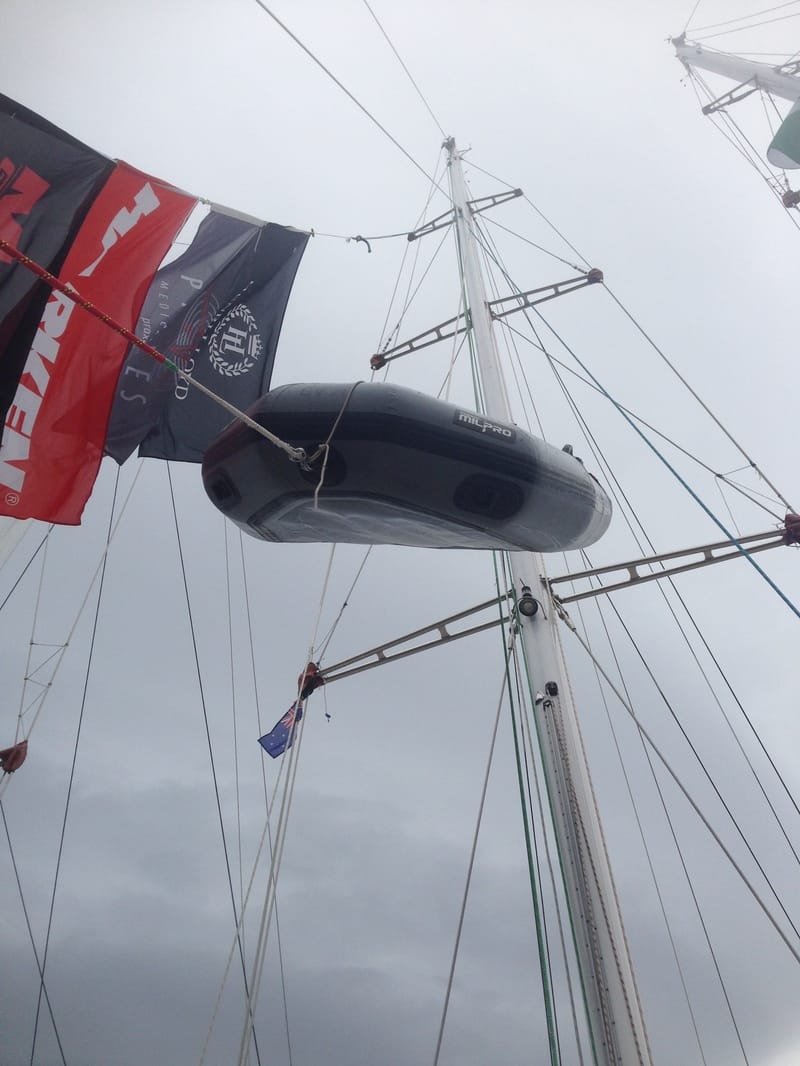
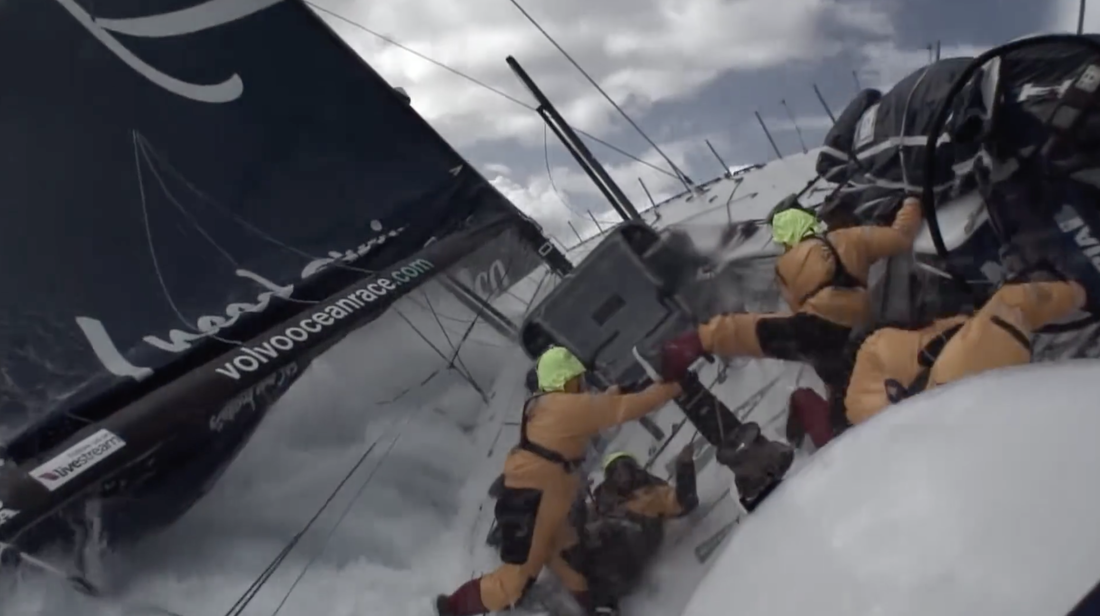
Click here for our review of the Le Chameau Neptune. Clipper Crew can claim 15% OFF the Le Chameau Neptune if purchased in February 2018. The DISCOUNT CODE is WARMFEET. Just enter the code at checkout. Sail safe.  Notice that the 'working' backstay on your left is not all the way back.. This means it isn't under any real tension and therefore isn't working properly! It should be straight from the yellow line at deck through the block and black line to mast. Photo: Mark Burkes First - During my time as a Training Skipper for Clipper - and for other schools - there have always been two things that could sometimes cause confusion. Neither is complicated, but it's easy to over-think them. One is the process of reefing and throwing out reefs - the other is the proper use of back stays when tacking. In fact, someone asked me about back stays just the other day, so I will try and address the issue in detail here; 1. What are back stays for? The basic role of the back stay is to help brace the mast when underway, more particularly (but not exclusively) when the stay sail is set. The line that makes up the back stay is effectively part of the rig in the same way as the shrouds, fore stay and back stay, although unlike this 'standing rigging', the back stays can be set or not set. They are effectively, 'running' rigging for this reason. The decision on whether the back stays are set or not is something that your skipper and watch leaders will make, but in every case I can think of, when the stay sail is up and working, one back stay should always be working. The reason for this is obvious when you stand back and look at where the windward back stay goes to on the mast. It offers additional bracing to the mast to counteract pressure from the inner stay, upon which the stay sail is affixed. The windward back stay (on the high side) is the 'working' back stay and this is structural. The leeward back stay is 'lazy' and whilst it is lazy it is not structural. However, during the tack, we also use the lazy back stay and tricing line for another purpose (namely to protect crew that are located midships from flogging yankee sheets). I will go into this later. When the stay sail is down (for example when going down wind) we might still set the windward running backstay, to help brace the mast. 2. Why do we want 'back stays back' before a tack? When you sit down and think about it, this too is obvious. We know one back stay must be working and one must be lazy. One is bracing and one is not. We know this because, in most cases, if we are about to tack we must be going upwind and we probably, therefore, have the stay sail up and working. If that is the case, one back stay is set and working. The other (the lazy, leeward, back stay) will be forwards and not working. As we tack, we put the bow of the boat (the front) through the wind. As we do this, everything will flog. We do our thing with sheets so as to reset the sails on the other side, grind on the new working back stay (the old lazy back stay) and ease off the old working back stay (the new lazy back stay). To 'grind on' a working back stay we must first pull it back into position by taking all the easy slack out of the back stay. We do this by pulling on the back stay line (with 3 turns of it on the winch). This brings the back stay back. If it won't come back, a line is jammed - probably the tricing line - which is used to bring the back stay block forwards when required. Check the line run and check the tricing line block is fully open. The back stay has to be back fully and the winch fully dressed (5 turns) and a winch handle in the winch before we can grind and it has to be ready to grind before we can tack. So the very first job to be done before we can tack is to bring the 'Back stay back!' Hence, 'ready to tack - back stay back'! The Tacking Process in Brief Now let's go back to the tacking process. As we put the bow through the wind, the sails cross the boat and fill on the other side. As this happens, the boat goes flat, then tips over on the opposite tack as the sheets are ground on and the sails fill. During the tack, we need to do three things, namely; (a) brace the mast on the new windward side. In other words, we need to set the new working back stay (this was previously lazy on the other point of sail - or tack). As the stay sail sheet is ground on pressure comes onto the mast so we need it braced as we tack. (b) tack the sails by releasing the old working sheets and pulling in the new working sheets - I won't address this here.. (c) protect the crew amidships. There is lots of commotion midships as the crew tailing and grinding the sheets start getting whipped mercilessly by the flogging yankee sheets! It hurts - a lot! Crew tend to lose their sense of humour when hit - so we are obliged to stop this happening - oh for the return of the lash! The Procedure for Back stays during the tack (a) Bracing the Mast? Before the tack, we bring back the 'lazy' back stay, pulling the line with 3 turns on the winch. We do this by hand until the back stay runs in a straight line from deck to mast. If the back stay won't come back you have probably forgotten to open the tricing line clutch OR the tricing line (or back stay) is stuck around something or the line is snarled. This is why it is usually a good idea to look forward at the line run you are pulling to check for this. Once you have the back stay back and in position, put two extra turns on the back stay winch (5 turns is usually about right for a back stay winch) and make off the line in the self-tailer so it is firm. Leave the tricing line clutch fully open for now! Otherwise when you grind the new working back stay tight, the tricing line will pull tight in the clutch and you'll break a fitting. When the back stay is back and the tricing line clutch is open, get yourself braced for the tack, grab a winch handle, put it in the winch and shout back to the helm 'BACK STAY READY'! At this point, the helm will look around the deck and look for other vessels. Everyone else should be ready, so now we can can tack. The helm calls the tack (or the skipper or watch leader). But what's that..? There is still a lot of screaming, shouting and welts appearing on people's faces... Hmm - we forgot to protect the crew. (c) Protect the Crew amidships? OK. Remember I mentioned that during the tack the yankee sheets tend to flog violently? Well, there is a way to protect our crew on the winches and this is where the other back stay comes in. During the tack, the new working back stay is being ground on hard. At that point, the old working back stay becomes 'lazy'. It isn't bracing anything anymore, so we can ease the line gently to release the tension and then send it forward (to where the lazy back stays live).. BUT Rather than just send it all the way forward straight away, we have another temporary use for the new lazy back stay. If you look at all the line runs on a back stay block, we have the back stay line itself (black and yellow lines in the photo above) and some more smaller line that runs from the block forward to the shrouds and deck (the tricing line). We have a nifty little trick to follow - see below.. First - what all the 'bits of string' on the back stay do - and why The tricing line (the smaller line attached to the block and shrouds) is simply there to help the person on the back stay winch pull the lazy back stay forwards when it is no longer needed. If it didn't exist, you would have to walk down the low side with the back stay block and secure it at the shrouds - this is not a good idea as it would result in you falling over - and maybe in! That's all the tricing line does in most instances. It isn't 'structural' as such. That's why it's a small line. The other bits of line are the structural back stay. They connect the mast with the block and the block with the deck and onto the winch - which we can grind on to create bracing load and a working back stay. The Nifty Little Trick! This is where we differ during the tack to when we normally just send the back stay block all the way forward, by the shrouds. Remember the moaning crew with bruises and welts all over their faces from the flogging yankee sheets? Well, we are going to protect them - aren't we thoughtful. What if, when we gently released tension off the old working back stay during the tack, (whilst the other back stay is being ground on hard to brace the new high side of the mast) we were to take the back stay block just halfway forward? Why? Well, if we put the block at mid ships and pull the back stay line (on the winch) and tricing line (that runs through the jammer) taught, we create a cage of lines. A taught 'cage' of lines which will protect the crew at midships from flogging sheets during the tack. They just bounce off the tricing line and back stay block. How clever is that! But sometimes people have trouble getting the timing right. You have to ease off the load gently so that the shock load doesn't shake the mast, then pull hard on the tricing line to move the block forward fast, whilst at the same time easing the back stay line on the winch. This can be awkward. Here is why; (i) the new 'lazy back stay' block will be pulled forward towards the shrouds by the you pulling the tricing line. (ii) The block will probably suddenly stop! Ah. Whay? What now? This is because the back stay line (yellow in the photo) is probably still turned on the winch. So to allow the block forward, pull the tricing line, having taken the line on the winch down to just one or two turns. Make sure it is running clean. Then continue pulling on the tricing line. The block should then move forward swiftly - under control. In light airs, the one turn on the winch will probably be just enough friction to stop the block swinging uncontrollably and banging someone on the head (normally the people on the high side yankee and stay sail sheet winches). When it's very windy or rough, you might need to give more thought to controlling the back stay line on the winch to stop this happening - an extra turn on the winch is usually enough. Practice makes perfect. To clarify - all we do is give a few good healthy pulls on the tricing line (armfuls of line) to send the block forward (as described above). The block moves swiftly forward (assuming we have only one or two turns on the winch) and when the block gets to the side gate in the safety rails, we pull hard on the tricing line AND the back stay line on the winch. Remember to stop at the gate - and always warn people you are sending the back stay forwards. So what have we achieved on the back stays? We've;
The Clear Up. The person on the new lazy back stay Once the tack is completed and the new sheets have stopped flogging, the lazy back stay block can continue to be pulled all the way forward. Then make off the line with three turns on the winch and make it in the self-tailer. Then close the clutch on the tricing line and pull it tight. Tidy up any leftover line and return to the high side. The person on the new working back stay You will have finished grinding on the back stay pretty fast - primarily because all your work was in the preparation, so all you now need to do is stow the winch handle safely, put the safety turn on the working winch, close the tricing line clutch (we left that open whilst we were grinding so we didn't break gear on the deck) and then tidy the lines and return to the rail on the high side. The Idiots Guide! Lots of people get confused with this procedure - especially if they are new to back stays. I think it's because they are unsure what all the lines do and why the procedure changes on the tack. Hopefully you get it now? Like everything else, once it is in your muscle memory it'll be easy. Remember, the whole process starts with "Ready to tack! Back stay back?' If you are on the rail or close to the companionway, you are well placed to do this. Which back stay comes back? Well look at the rig. One back stay is already back, so it must be the other. Simple! Which line do you pull to pull the backstay back? The thicker, back stay line that is round the winch - that's the one to pull. Remember, the person on the low side with the lazy backstay starts the tacking process! The boat cannot tack until that back stay is all the way back and the back stay runs in a straight line from deck, through the block to mast. So once the tack is called - get that back stay back! Remember to let people know the back stay block is moving. "BACK STAY COMING BACK!'. Once back and running straight from deck to mast, add a couple more turns on the winch (watch for riding turns and use good winch handling technique) so there are five turns on the winch. 'Make' the line in the self-tailer and put a winch handle in the winch. Check the jammer / clutch on the tricing line is open. Now you are ready! Once you are ready to winch, with back stay back and tricing line open, turn to the helm and shout 'BACK STAY READY!' The boat tacks, you grind your winch (the new working back stay), the person on the opposite side of the cockpit gently eases the load tension on the winch, then quickly sends forward the block to midships by pulling the tricing line - make sure the turns on the winch are not stopping the block moving forward! When the block is at the gate, pulls both lines hard to protect the crew - then after the sheets have stopped flogging send the block all the way forward and tidies up. Top Tips:
TROUBLE SHOOTING & ERROR AVOIDANCE
Remember - you are doing the first job on the tack if you are bringing back the lazy back stay. Get on with it! Once everything is set and you are ready to grind - grab a winch handle, put it in the winch (check tricing line clutch is still open - for now - and shout 'BACKSTAY READY'! How easy is that..? If still unsure - ask. And perhaps take a few minutes with your crew to practice alongside when it's quiet - check with your skipper or mate first obviously. I hope this helps. It should go without saying that as practices change, you should always follow Clipper's own sanctioned training methods - but in general terms this is a tried and tested procedure that Clipper have taught for years. Like and Share it please...! If you find this and other Fierce Turtle blogs useful please take the time to like us on Facebook and share the blog among your friends. And make sure you subscribe for more blogs and discounts. Sail safe!   Sydney's not a bad place to stopover! If you look at the geography and the prevailing trade winds, it's pretty obvious that to sail around the World today (if you start in Northern Europe) then you have to sail South across the Atlantic and then either go East or West. Going East is far more sensible. With this reality in place, it becomes likely that Brazil and South Africa are going to be two of the first ports of call. Going East, Western Australia makes sense and then you have to get to China for the Qingdao stopover (which is not to be missed for spectacle). Whilst in Oz though, it seems appealing to compete in the Sydney Hobart Race so continuing East, either around New Zealand or Tasmania, Sydney has been a regular stop for the last few races. Before that New Zealand and then Australia's Gold Coast were stopover ports. Leg 4 is, therefore, usually Western Australia to East Coast Australia, perhaps including the Rolex Sydney Hobart after Christmas and then a short hop back up the East Coast. The leg needs to advance the race to China. Going East around Australia makes some sense as there's a large continent on our doorstep. Because it's Christmas Sydney Hobart is a possibility. Then you need to go North to get around Australia and back towards China. This means lots of races The advantages to Leg 4 are, in my opinion, as follows; PROS
CONS
All in all, I'd say Leg 4 is a good leg. It has several races, it's set in a great part of the World and there are iconic events and locations all around you and a mix of conditions. What's not to like? The Clipper Race isn't a cheap activity. Therefore, it makes sense to do as much as you can to make yourself as useful as possible on the race. To paraphrase John F Kennedy "ask not what your crew can do for you, but what you can do for your crew". Improve your skill set! Making yourself as knowledgable as possible means you can give more to the boat. Giving more to the boat means you get more back. It's that simple. You should read the Clipper Training manual before Level 1, especially if you are a non-sailor. In fact, if you already sail, reading the Clipper manual is probably just as important, because you'll be learning 'the Clipper way'! Ask the office for the PDF. Before Level 1 Training
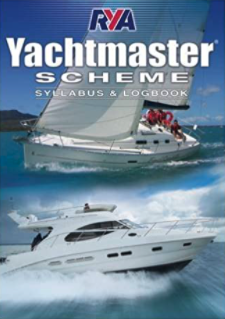
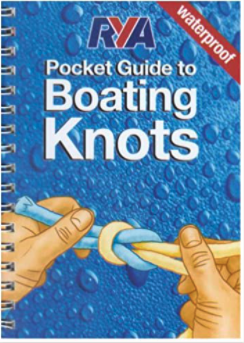
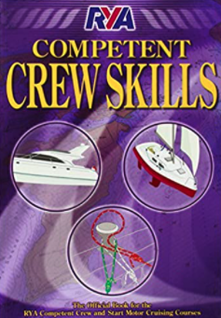
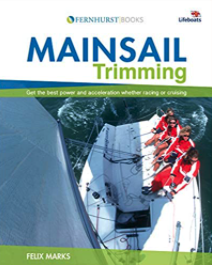
The RYA Syllabus has a logbook in the back which most sailors use for logging their miles and qualifications. If you intend to continue sailing, buy a logbook and get your skipper to sign it at the end of the course - at the debriefing. You need to decide what is useful to you. If you're a non-sailor just buy the Competent Crew book and knots book (or an app). Day Skipper is a bit too advanced. Before L2, reading the easy-to-read books on sail trim would be a great idea.
Before Level 2 TrainingLevel 2 is spent largely at sea. After building on level 1 training, you'll be off to experience spending time in a watch system. An ideal opportunity to put into practice sail trim and 'tweaking'. Go play! That's what you are at sea for after all. Team Spirit is just an interesting read.
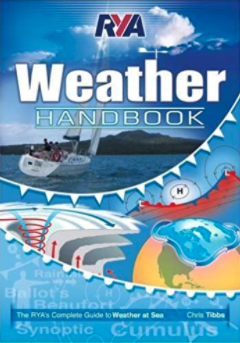
Before Level 3 and 4 TrainingLevel 3 concentrates on spinnaker work and race tactics. By now, learning about the weather is also a good idea. There are books produced by the RYA which cover Northern and Southern hemisphere. Dependent on which leg you are racing, consider buying and reading one. They are well illustrated and easy to read.  Leg 3 is a biggy ! The Southern Ocean must surely be on every offshore sailor's bucket list. The 'Roaring Forties' below 40 degrees South are renowned for massive low pressure systems and monster waves. Crossing from The Cape of Good Hope to Cape Leeuwin (or thereabouts) means that you have undertaken a big challenge. It gets cold, wild and wonderful. In previous years the race has started in Cape Town and finished in Western Australia (usually Albany or Geraldton).
Pros;
Cons;
Leg 2 is, as the name suggests, still quite early in the race. The round-the-world crew and those that are continuing from leg 1 have some experience and they will know their way around the boat and be much better at sailing her and undertaking 'evolutions' such as reefing and sail changes. Also, leg 1 is over and the race is very much on!
In previous years the race has started in Rio de Janeiro and finished in Cape Town. Pros;
Cons;
 (aKnown as one of the 'glory legs' because you get to start the race with all its associated excitement, leg 1 is a long leg (about 5,000 miles). Sometimes split into two races, the leg takes you across the North Atlantic, the Doldrums and equator and delivers you to the southern hemisphere on the South American continent. It is generally warm (sometimes very hot) and the weather is generally less demanding than most of the other legs - although you will see what you think is big weather along the way.. That's until you've finished leg 3!
Pros;
Cons;
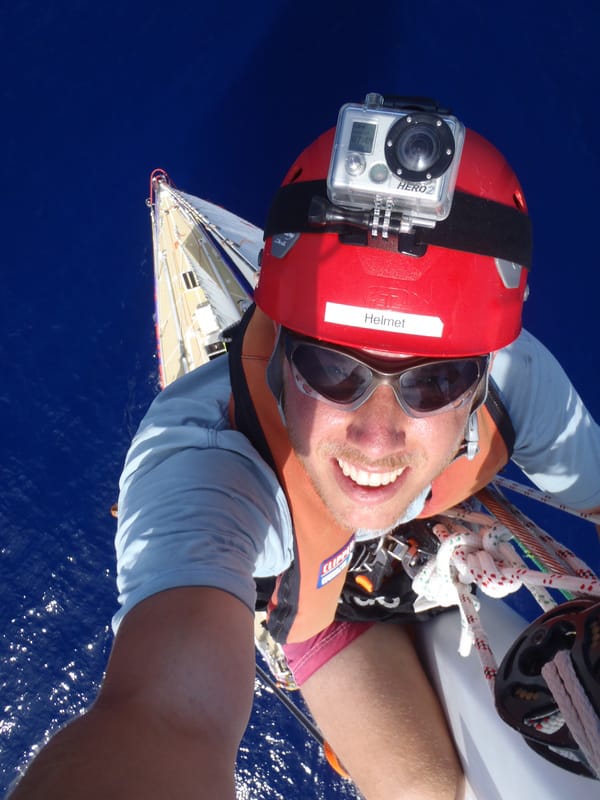
That's my view but if you have a different take on things, please feel free to comment below. If this blog is helpful please consider liking and sharing on Facebook. To subscribe and hear more about the other legs and the race in general, plus crew discounts and flash sales, subscribe. Regular, preventative maintenance of your boat and its systems is critical when undertaking an ocean passage; even more so when you're pushing the boat in race trim. A significant part of your maintenance programme will include your sail wardrobe and standing and running rigging. To check the rig, blocks and halyards, you're going to need to do a mast ascent and this will mean undertaking a risk assessment. Yes, yes, 'Health and safety', but believe me, the first time you leave the rig in an unplanned swing, you'll be a believer! Climbing a rig when underway is different to when sitting alongside a dock.
If you plan on being up there a while, a 70 cm long strop with a carabiner clip on both ends can be useful for attaching yourself more securely to the mast whilst working aloft. Once the climber is ready, check the lines for the climb as follows;
Before you start the ascent, you are going to need something to stop you swinging off the mast and acting like a conker, halfway up. There are a lot of hard, sharp bits of metal up there and you get quite a speed up if you do start swinging. Trust me, I know. I'd recommend using your safety line. Clip it to your lifejacket hard point, then put it around a halyard that goes to the top of the mast (on the same side as the ascent) and clip it back to your jacket. This way, you are not 'connected' to the third halyard but, if you lose connection with the mast your swing will be limited to 2 or 3 metres. It'll still hurt, but you'll be under some control. If you don't have a spare third halyard then rig a downhaul line, attaching it to your harness strong point and running it down to deck, preferably through a block near the mast foot at deck level and back to a winch. This too, will help arrest a swing. On a very large vessel, a downhaul must be used, otherwise, there might come a time where the weight of the halyard in the mast overcomes the weight of the climber and at that point up you go! Not pretty. On the ascent, if you are fit and strong enough to climb, make sure your crew mates know so that they can take up slack as you go. If you're going to be winched, try and stay on the high side and ascend spiderman like, making sure to keep hold of the mast and rigging as you go. If the boat is heeled over, stay on the windward side of the mast and that way you have gravity working on your side. Watch you don't get fingers and heels stuck in the nooks and crannies of the rigging. As you go up, someone needs to be running the deck, making sure winches are being handled properly. Someone should also be 'eyes on' the climber at all times, relaying signals as they ascend. Once there, the halyards should be secured and I'd recommend a clove hitch on top of the winch turns at the end, so as to prevent a line coming off a winch or someone accidentally removing the line. On this point, never leave your winch when there is a crew member on the end of the line! Close the clutches on the halyards if you have them. On descent, first, open the clutches, then remove the clove hitches. Take the primary winch down to the number of turns that will allow you to ease the climber freely, but under control. This will vary dependent on the halyard and winch size but three turns is probably good. The secondary winch needs to be eased faster than the primary (otherwise it'll be a jerky and uncomfortable descent for the climber). You might consider removing turns to 2 turns and let the line run freely as the primary winch controls descent speed. Don't let the halyards run through your hands. Ease them in long, smooth actions, hand to hand - their crotch area will appreciate it. As the climber descends, the person in charge keeps watching the climber at all times and communicating with the deck crew. Once back at deck, make sure all halyards are secured properly to the pin rail, making sure that each halyard run is correct and not tangled around the forestay or rig. Always look up when handling halyards to prevent this eventuality. Despite all of this, it can still go wrong. Just make sure you remain attached to the third halyard or downhaul and a painful swing is the worst you can expect.
Well, those that have done 'a little sailing' tend to have picked up bad habits; habits that they might have been able to get away with on a smaller boat but habits that cannot be tolerated on bigger boats. Boats over 50 ft tend to have quite large loads on running and standing rigging. 70ft boats have huge loads on sheets and halyards and if things break you can get hurt. Therefore, learning where to move around on a boat and where to be safe needs to be taught - and sometimes re-learnt. If you've never sailed before, you get to learn the right way first time. The downside to no sailing experience is that to a large extent you are having to 'cram' an awful lot into 4 weeks of training. In my mind, Clipper Training is the best training of its sort and whilst it must, by necessity, leave gaps in knowledge, it does what it needs to do and covers safety on board, emergency drills, safe line and winch handling and evolutions (sail changes and reefing etc), etc. If you work hard and you're open to learning then, as a 'round the worlder,' you should finish the race a very competent seafarer. You won't be a yachtmaster, but you will have experienced weather and sea states that most sailors will never see and you should be pretty good at helming and trimming sails. If you are an experienced sailor or racer then you might find the first couple of levels somewhat pedestrian but, of course, everyone needs to learn the basics. If you are experienced then ask the skipper and mate if you can get involved with the nav or maintenance tasks or use the time to fill in gaps in your knowledge. Both the skipper and mate are Yachtmasters and cruising instructors as a minimum. Many have done the race before as skipper or they are Yachtmaster Instructor, so they should be able to answer your questions. The Clipper Race runs every other year and training for it is pretty much continuous.
If you haven't sailed before, I suggest you go do some. Level 1 is fairly tame and you'll get a good idea of what's to come, but if you haven't sailed at all, how do you know what you are letting yourself in for? There are plenty of ways to get on the water. I wouldn't recommend an RYA course on the water prior to Level 1 training because, frankly, the skills taught vary so from instructor to instructor that learning the 'Clipper-way' first is probably better. However, if you can get on the water before Level 1 to get a feel for it then great. Dingy sailing is good because whilst its a million miles away in terms of experience, you will quickly get an invaluable 'wind awareness' which will stand you in good stead later. Do some reading also. The boat must come first. That means putting together a full list of things to do and allocating crew to each task. You may have a long list of things to see and do, but there is a real possibility that a lot of them will have to be cancelled if the boat needs work. I say this now because, in my experience of two races, this becomes a real gripe amongst some crew. The fact is, even with the excellent support offered by the small team of shore crew, you will be busy during the stopover and you will be required to give time to the boat in one way or another. Part of the fun of circumnavigating is (or at least it was for me) being part of the circus that travels around the World every other year. Some ports are bigger than others and each one has its own charms. I will promise you one thing. After 3 or 4 weeks racing across an ocean, making landfall is a very pleasant experience! But when you get to the finish it's not all parties and story-swapping. There is work to be done - and sometimes lots of it. Also, if you happen to have had a bad race and finished late, you have less time in which to do this work.  Geraldton and Gold Coast Crew letting their hair down at Gold Coast, Australia (Clipper 11/12)
This will include PR visits, radio and sometimes TV interviews, skipper meetings, corporate sailing days and the like. During my time as skipper I could never find enough time in the stopover - it was manic. On top of maintenance there are the corporate sails. These are days where the sponsors get to entertain clients on day sails. As part of your crew contract, you may well be required to participate in these days. I always used to enjoy these days, but they are full on and generally you have to write off at least half a day for this - assuming you swap out at lunchtime. Of course, as long as you get in on schedule there is no reason why you can't have 3 or maybe 4 days to yourself. The better you do in the race, the more time you are likely to have! So there's a real incentive to be first boat in. 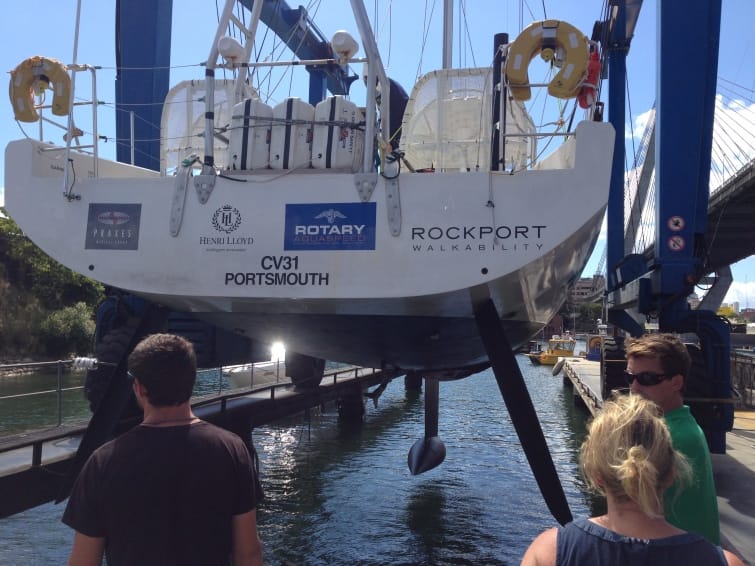 The fleet being lifted for anti-fouling by crew (and skipper) Sydney 2013/14
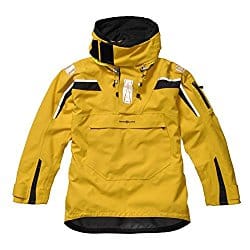
 Keeping warm at sea is just a matter of preparation and attention to detail. Of course, on some of the warmer legs, such as leg 1, leg 7 and much of leg 5, keeping warm on board is not a problem. In fact, dealing with 40+ degree temperatures and high levels of humidity below deck is the biggest challenge. If you want to read more on these warmer legs and how to keep cool, click here. In my experience, staying warm requires that you look after yourself by eating well, staying active and staying as dry as possible and as well insulated as possible. Staying active on the race is rarely a big problem but there is an art to choosing the correct clothing for the conditions. On a very cold night at sea, when it's wet and rough, with water over the deck (and the crew), staying dry and warm without overheating when busy changing sails, can be tricky. The start of a watch might have you thinking you are under-dressed, and feeling the bitter cold and yet 30 minutes later you might be sweating profusely having just dragged the yankee 1 down the deck, battling against sea state and gale force winds. Understanding the best way to layer is therefore important. For a cold ocean, you should be dressed as follows;
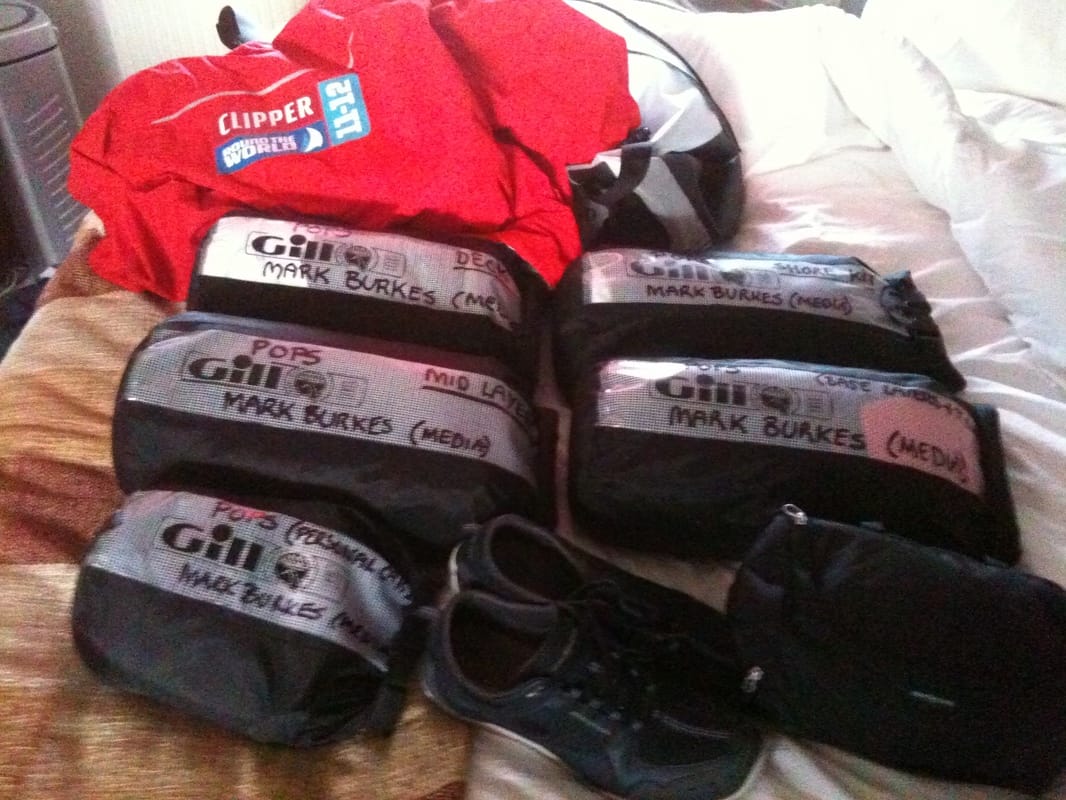
 This is my suggested packing list for Level 1 Training.
Other useful stuff to consider:
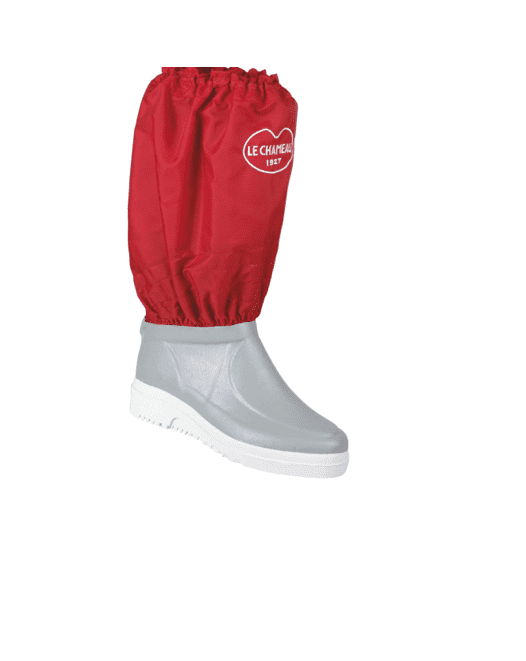
Level 1 starts alongside. I guess it'd be hard to start anywhere else! However, expect to be alongside until lunchtime on the first day. There is a lot to learn before you go sailing. At the time of writing, Level 1 Course start at about 1700hrs on a Thursday and you slip lines about lunchtime (ish) the following day. This may change over time so always check with Clipper. Clipper will have told you when to rock up, which boat you're on and it's likely you'll know who your training team will be. Each yacht has a skipper and a mate and it's likely they will be on board for several hours before your joining time. If you are early, it's best to let the office know you are there and use the opportunity to do any paperwork. Don't bother the skipper and mate as they'll be busy doing rig checks and paperwork; so try to keep out of the way until your designated joining time. In any event, you probably won't be able to get onto the dock as you won't have a security tag. These are issued by Clipper after you formally join. You can always fill time getting a coffee. Go to Hardys or The Boathouse and practice your knots over a coffee. Or alternatively try out the cakes at The Pumphouse located about ten minutes walk away. Or there's the Castle Pub at the marina entrance, but probably best not to meet your training skipper smelling of booze. Alternatively, Clipper want you to try on your race-sponsored gear (where provided), although this is normally done later in the training process. Perhaps have a browse of kit in the office ? If you want to go for a wander, the office may allow you to leave your bag with them if you smile sweetly (assuming they have room). It does get pretty manic in the run up to the race. If the delights of Portsmouth appeal, take a foot passenger ferry over to Gunwharf Quay, a large and modern waterside shopping and leisure complex. The ferries run regularly about every 15 minutes and the terminal is close to the Gunwharf, which is 5 minutes walk from the Portsmouth side of the ferry - ask for directions when you get there. Basically, walk to the taxi rank and turn right, following the main road for about 100 metres. The Course Content Level 1 is your introduction to Clipper and, for many, it's also an introduction to sailing. It's often stated that something like 40% of all Clipper Crews have never sailed before they start training. That's quite a startling statistic. Of course, many have sailed for years, although few have sailed boats over 60ft. There is a big difference between a 36ft family yacht and a 68 - 70ft ocean-going race boat and so, in that respect, all training crew are more than literally 'in the same boat'. Clipper will say it best but, in basic terms, this writer would sum up Level 1 as being an introduction to the boats and how they work, basic sailing principles and safe seamanship. At the end of Level 1 you should be a relatively safe and reasonably competent crew member on a Clipper boat. In three words, Level 1 is primarily about safety, safety and... safety. It's also quite a shock to the system if you've spent a couple of decades driving a desk for a living and sleeping in your own private, centrally heated bedroom! Day 1 starts on arrival at 1700 hrs and after a brief 'get-to-know-you' session, you'll be straight into safety briefs below deck. School night nerves? What to expect. Arrival always reminds me of the first day at school. Lots of crew members all nervous and excited, perhaps a little apprehensive. It's quite sweet really : ) A new environment with lots of strange new things and dozens of new terms to learn and understand. It can be daunting for the complete novice, but don't worry. The guys and girls in the office know exactly what they're doing and they are great at putting your minds at rest. Many are keen sailors or they've done the race themselves, so you are in good hands. The skippers and mates are, to a greater or lesser extent, fairly well house trained, civilised types and rarely bite unless the teas and coffees stop coming to deck! Remember, they do this every day of the week. You simply cannot ask a stupid question. At least, not one that hasn't been asked many times before. So, deep breath, smiley face... and begin. We'll assume that you've made it to the training office on time with all your kit for the week. You also have your passport safe and Clipper have done all the formalities. You'll have signed all the next of kin forms, have insurance and you're ready to go. Remember, if you are training between October and May in the UK it is likely to be very cold at night on board and during the day at sea, so pack sufficient kit. On the race you will be limited to between 20 - 25 Kg of kit (usually plus foulies and sleeping bag), dependent on your skipper, so try and start being ruthlessly efficient when packing for training. After all, it's only a week. Suggested packing list for Level 1. CLICK HERE You will usually be met at the Training office by your skipper. Hopefully you are carrying no more kit than a rucksack or sailing bag and a sleeping bag. If you have more then you've probably overpacked. Clipper provide foul weather kit for training so you just need to bring stuff to keep you warm. The first evening is spent getting to know the skipper and mate and the rest of the crew. You'll all be walked through the boat and talked through its systems in quite a bit of detail. Everything from how to safely secure your bunk to where to find the fuel cut-off valves and life rafts. All will be addressed. Then, you'll go through the course and this is where you get an idea of how the skipper has planned the week. He or she may decide to allocate crew to watches (your team within a team for the week) and within each watch there are various crew functions. Every skipper has a preference. You'll also get a bunk allocated and you can start to stow kit either then, or later, dependent on the skipper's preference. Top Tip: Keep your kit in your bag (preferably decanted into one or two dry bags) to keep it dry. The smaller bags are good for 'decanting' stuff into for organizational purposes! The 'cave lockers' on a 68 (the old fleet, usually used for Level 1 training) can get quite wet and unprotected kit will be soaking in no time. On CV6 Geraldton on the Pacific leg (a very wet leg) I was bailing bucket loads of water out of my cave locker every day (can you hear violins?). My kit was floating in sealed dry bags (yup, definitely violins). Training isn't that bad because you don't get as much water over the deck, but the lockers still get wet. You might also want to invest in a waterproof phone case for the same reason. Dependent on crew numbers you will each have a specific responsibility, as well as sailing. This might be 'mother' duties (cooking for the entire crew and washing up after) or engineer. Navigator or cleaner - or deckhand. All crew are expected to take responsibility early on. You will be shown what to do and you are encouraged to ask if unsure, but the responsibility for your job is yours. Without delegated tasks and responsibilities it will quickly become apparent that a large yacht will grind to a halt, fast. Taking the delegation of responsibility seriously is important. Don't worry if you know nothing about rudimentary checks on diesel engines, the basics will be taught through the week. The same with navigation and log keeping. If you can't make pasta or boil an egg it might be worth getting some tips on basic cookery though! The delivery of warm, edible food on time for 12 people can be quite daunting for the novice, especially when working in a small galley at sea. The first night is a good time to let the skipper know of any physical or health issues (although he should already have been told - which means you need to have told the office) and if you are allergic to anything or have dietary requirements this should have been allowed for in the food shop (victualling). Don't be embarrassed to check, just in case! What's a 'watch system'? Basically, it's shifts. You work for say 4 hours, then rest for 4 hours and so on. During training you might be split into two watches, usually between 4 and 5 on each watch. You won't be in a proper watch system until your first night at sea, possibly much later in the training (Level 2), but as the course progresses you will probably be split into watches to do sail changes, reefs, etc. When day sailing you may be split into watches for evolutions, but you won't usually go off watch. Each watch member is paired with their opposite number on the other watch. Then when it's your time to be 'mother' or 'engineer' you share the duties with your crew mate. It means there is always someone on watch to make the tea or fix the heads! On the race, living in a watch system becomes normal after about 3 days and whilst you probably only sleep for about 2 - 3 hours at a time, it's amazing how quickly you get used to it. That said, on L2 Training you will work all day on the first day and then as and when you go offshore, you'll go into a watch system (usually after dinner). Because you haven't had much of a chance to 'claim back' the sleep you lose on the first night, you will be tired at the end of the 'sea phase' and that assumes you have been able to sleep at all. A word of warning - when in a watch system, it's critical that you turn up on deck and announce yourself (so they know you are on deck at night) at least 10 minutes before your watch starts. This means getting up in time to wash, dress (and possibly eat too) before you go on deck. Get it right. Turning up late to your watch is probably one of the biggest sins you can commit on a sailing vessel. Tired, cold people rarely have much patience for such inconsiderate behaviour... You have been warned : ) Top Tip: 'Mothers' remember you need to feed the watches on time to avoid late watch changes! Food & Diet Food on board is usually simple but warm, nutritious and provides sufficient calories for the day. On the race, a cold leg will usually have the average male crew burning 5,000 calories per day. Training is much less demanding, but you will want to eat! Most skippers provide victualling for a meal plan including for breakfast, a simple lunch of soup / sandwiches, baguettes or similar and a warm evening meal. There are usually plenty of snacks, biscuits and fruit. If you have special dietary needs (and especially allergies) tell Clipper - well before you arrive! There are no convenience stores at sea. Top Tip: Bringing a couple of bars of chocolate with you for a midnight-watch treat does wonders for morale on a cold, dark, rainy night and makes you, unsurprisingly, very popular amongst your crew mates. Skippers usually split jobs into a daily rota with two people (one from each watch) working together to complete the various jobs. This is managed so that the day is, except for lunch, largely left free for sail training, although mothers and navigators have to juggle their responsibilities around their own tasks. Of course, whilst you are expected to do your job, the training team don't expect you to take charge of the yacht's actual navigation. They will always know where they are and where they are going! What to pack and what to buy for training? Keep your money in your bank account for as long as possible. Certainly, once you've had a chance to decide what might suit you, come to us and we'll be happy to sell it to you! If we don't sell it check out our list of retailers that are worth speaking to (some even give Fierce Turtle members a discount). But in the first instance, simply splashing cash is premature. Make sure you download our recommended packing list. Ask fellow crew about their kit too. But remember what works on Leg 7 won't necessarily be sufficient for Leg 3. For example, I have no doubt that anyone doing a cold leg will want a good, marine sleeping bag. For the race, you will all need good mid layers and proper, 'wicking' base layers and lots of other stuff to, but for training as long as you have a warm, quick drying fleece and a few warm, thermal beanies (woolie hats) and buffs (tubular fleece neck scarves/gaskets) and gloves, you will be fine. You will also need good ocean going sailing boots if you are doing legs 2, 3, 4, 6 or 8 (and the last week of Leg 5) but unless you are absolutely sure you are doing the race, I'd recommend you hold fire on spending too much too soon. If you have decided to splash cash now, check out our kit reviews here. In response to demand, we also offer crew in training Le Chameau Neptune boots on hire for just £49! Click here for details. If you are training in the UK between January and March I suggest you consider hiring a marine sleeping bag. These are fleece lined, warm, waterproof and very very comfortable. Click here for details of our offers. When you do buy, buy the very best you can afford. Subscribe with us for flash sales and crew discounts! For a week's inshore sailing, as long as you have two pairs of grippy shoes with non-marking soles (in case one pair gets wet) and a pair of boots (cheap sailing wellies will suffice for Level 1 - with decent grippy soles) but the hire option is worth considering.. At the time of writing, Clipper provide foul weather salopettes and jackets, so it's just the other stuff you need to bring. If you are the proud owner of a smart phone it's worth considering a waterproof cover to keep it safe from the wet environment. Level 1 Course - Day 2 onwards Most of the morning is taken up by an introduction to the boat's deck, safety procedures, communications equipment, line handling, rigging the boat for sea, taking down weather forecasts, passage planning and general preparation. The principles of the recovery procedures in the event of a man overboard, the use of flares and other equipment and basic VHF communications will also be addressed. Boats are usually away from the dock after lunch and the rest of the day is based around hoisting the sails, introducing crew to the principles of sailing, 'the tack' and 'the gybe' and possibly a little time looking at points of sail. During the day crew will be handling sails and lines and some, probably not all, will have a chance at helming the boat and managing it, dependent on their roles and responsibilities for the day. At the end of the first day, the training yacht will usually return to Gosport in the early evening (say 1830hrs) and after packing away the boat and sails all will return below for a well-earned evening meal, cooked by the designated mothers. After supper there is usually a short crew debrief and if people are still awake there may be a short lecture on the skipper's chosen topic. This is usually delivered by the training skipper or mate and may involve a 'whiteboard' session and some discussion. The day normally ends after mothers have washed up and it's not unusual for crew to get away to the local pub for a 'swift shandy' just before last orders. Then its a shower for the more fastidious, before collapsing into your bunk, tired and cheeks burning from a day on the water. Level 1 is primarily run 'inshore' with 'passages' reserved for later in the training process. Each day builds on your new-found knowledge. The training team will plan the delivery of the course around the prevailing weather conditions and crew strengths. Different points of sail, reefing procedures, sail changes and emergency drills and man overboard recovery are all covered. It's very unlikely that you will see a spinnaker (the biggest downwind sail on the boat) on Level 1 and the boat is unlikely to venture far from the Solent and its approaches. After all, the skipper and mate need to be sure that the crew are at a sufficient level of competence before they leave the comparative shelter afforded by sailing inshore. The last day will find you returning to the local area and upon return to Gosport you will be introduced to the delights of 'the deep clean'! A deep clean is, as the name suggests, a comprehensive 'strip-down' of the boat and a thorough scrub of everything including 'the heads' (toilets), the 'galley' (kitchen), lazarette (stores/garage) and bilges (no explanation needed?). This is a critical but less exciting part of the course and it is something you will do many times during your Clipper Career, although it's somewhat less exciting than the sailing. It involves some mucky work and whilst it might be tempting to slack a bit, skiving off the 3 - 5 hours it might take to do a proper deep clean (dependent on crew motivation) will quickly make you unpopular amongst your peers. It also makes for a slower clean, so try and get stuck in and resist the temptation to 'just take your bags to the car'. No-one is finished until the job is finished; very much the spirit of the race itself. Of course, I know you wouldn't do such a thing dear reader, but some weaker characters might be tempted. On the same subject, when travelling to and from the course, make sure you allow enough time for participation in the deep clean. During the clean the skipper will usually use the time to start debriefing crew on their week and finishing their evaluations. Skippers make a recommendation on whether individuals are sufficiently competent to progress to Level 2 and in most cases the training is comprehensive enough, and the enthusiasm of the crew is strong enough, for most to pass. Sometimes a skipper may suggest more time on the water before Level 2. The office can normally arrange this for you if you speak to them. In most cases a plan for the remainder of your training will be discussed during the debrief and this is also a chance to share your feedback on the week and share your concerns or questions. "Remember, there's always one crew member on any boat that has the potential to be an irritating prat. If your boat doesn't have one, just allow for the possibility it might be you.."! The debrief is where you get an insight into your sailing capabilities from the mouth of a professional and sometimes the experienced boat owner is surprised at just what they have learnt during the week. Even the most experienced of us learns every day we're on the water - if we let ourselves! It's also used as a sounding board for crew and its an opportunity for skippers to raise any non-sailing issues with crew. If your skipper starts talking about 'tolerance of others' and how 'some people are, perhaps, er too strident in their views..' and suchlike, he or she may be trying to tell you to 'wind your bloody neck in a bit!'. One of the hardest parts of racing around the World is crew dynamics and whilst our individual idiosyncrasies and character traits might be easily forgiven ashore, on board a 70ft fibreglass tube for weeks at a time, they quickly become very irritating. Part of a skipper's job is to try and address these issues with crew members early on. It's not easy and they don't do it because they enjoy it. But it is important to listen if you do hear a little criticism in the debrief. None of us are perfect. On the last night it's normal for the crew to get together for a meal ashore. Every meal during your week will have been on the boat, so a little civilisation is usually welcomed by now! It's a chance to have a chat about your new adventure, laugh about your cock-ups and build on new friendships over a couple of glasses of wine. Some crews take the opportunity to reward their training team with a meal, some don't. It's entirely a personal preference. By the end of the week you will know how to sail! OK, you may be no expert, but you'll be effective crew and able to rig the boat, de-rig it, undertake basic checks, know various skills and drills and generally be a useful member of crew. Then you can look forward to Levels 2, 3 and 4 (aka BIG school)! In any event, you should be confident of one thing - you will LOVE IT! Promise. Alcohol On Board Remember, alcohol onboard is very strictly forbidden. Drinking alcohol is, in general, not encouraged during the course - certainly not when on the water! After the crew meal on the last night it is tempting to let your hair down. We are (most of us) grown ups, but beware, being 'drunk' when coming back to the boat on the last night won't be tolerated by the skipper, or Clipper, and if you do over-indulge don't be surprised if the skipper invites you to end your course by sleeping on a park bench in Gosport! It's his livelihood at stake and you are his responsibility on board, so its best to respect that reality. If you are late back your skipper won't thank you if he's had to wait up until you are safely back on board. Remember, the marina is tidal and cold. Falling in is a serious matter and potentially fatal. The Last Day The last day starts with breakfast and whilst the skipper starts debriefs the crew will start the deep clean under the instruction of the mate. It's usual for all crew to be free to leave by no later than 1400 - 1500 hrs on the last day of a course (usually a Thursday for Level 1). Check with the training office if you aren't sure of timings as these may vary. Smoking on board As a non-smoker, this has never been something I have needed to consider. Certainly smokers are becoming less and less prevalent on the boats. Once upon a time it seemed like every sailor smoked; less so now. That said, there are usually some fairly basic rules on board any boat and they are likely to be the same rules that your skipper will lay down. In any event, and subject to each skipper's rules, if you are a smoker it's unlikely you'll go far wrong if you do what you'd normally do;
Showers & General 'Landlubber Prettyfying' On Level 1 most nights will be spent alongside, meaning showers and toilet facilities are available on shore. Luxury! I have found a large travel towel is useful as it dries better and doesn't smell when damp. Ten damp towels in the accommodation area (The Ghetto) make for an interesting aroma after Day 4. Hopefully this has given you a pretty good outline of what to expect from Level 1. Please comment below if you have any questions. Also, check out our blogs and FAQs for other information. Sail safe ! Parking & Travel Clipper have a dedicated car park at Gosport Marina. It has a gate and is therefore relatively secure, although open to pedestrians. You can reach Gosport by car or train (via Portsmouth & Southsea Rail Station and the short pedestrian ferry ride to Gosport). The marina is 3 minute's walk from the ferry terminal, next to the Castle Pub.  A crew member calling for his pal, Raaaaaaaulf in moderate conditions. Those of you that have read 'Tales of the Riverbank', might believe that there's "nothing but nothing so absolutely wonderful as messing about in boats", but I'm pretty sure Badger and Ratty hadn't been on the weather rail all night, downwind of a projectile-vomiting Toad. 'Mal de mer' as the French would say, is basically motion sickness; the disconnect between what your eyes are seeing and what your balance receptors are telling your brain. It causes the body to react and it makes you feel nauseous - and sometimes vomit; sometimes spectacularly. In itself this is nothing but unpleasant, although in severe and prolonged cases it can cause dehydration and therefore result in further complications. It is therefore imperative that you keep an eye on a sufferer and encourage them (without nagging) to keep sipping water even if they are feeling very ill. Remember too, if you are taking medication, including the contraceptive pill, you are in danger of losing its beneficial effects after a bout of vomiting - even once home. If you suffer in cars or on flights, it is more likely that you will need to medicate when at sea in rough weather. Common sense would suggest that if you already know that you suffer, be prepared. The key is to medicate early (12 hours before you sail) if the remedies are to have a chance to work. They do say that there are only two types of people in this world; those that suffer from sea sickness and those that have yet to suffer. Most people are not normally sea sick, although many worry themselves unnecessarily about it. I'm one of the lucky ones. I did feel sea sick when I first started to sail 25 years ago but almost never was, except for one night in a F10 storm off the Moroccan Coast. Nowadays I don't even think about it - although I am very aware that we can all get it if a bit under the weather, so I am not saying it won't hit me again! Anyway, Lord Nelson was sick every time he went to sea and he was quite a decent sailor by all accounts. The good news is that sea sickness will pass. On the race a severe sufferer might be ill for 2 - 3 days. As the weather abates they recover. The more hydrated you stay the faster you get better. Most are only ill when it's pretty rough and even then, only for the first 24 - 36 hours of a trip. Unfortunately most early offshore phases in Training are 24 - 48 hours in duration, so if you are one of the unfortunates you might not see the other side of the sea sickness coin before you are back alongside. Don't worry - trust me - it will stop, eventually! In any event, like so many things at sea, look after yourself and look after your mate. Be considerate of those suffering - you might be next! And if you suffer, there are always drugs to help... The bad news is that there is no absolutely guaranteed preventative measure available in capsule form. You will need to try several if you suffer and work out what works for you. What makes you sick? A trigger with newbies is extended periods of time at the chart table - or in the galley, so try and avoid that if you start feeling ill and if you do feel poorly when cooking, take a few minutes to get some fresh air and check out the horizon - this really does help a lot. The smell of diesel or a flushed heads (toilet) can set you off too. You can see why being below is a factor for some. If you allow yourself to get too cold or too warm it can strike the more susceptible. It also prays on the hungover and those feeling 'under the weather'. Apparently, women having their period are more likely to suffer, although I'm afraid I'm no expert in that department and will steer clear of advice there. The classic for Clipper Racers in Training is after dinner on their first night at sea on L2. Eating too many stodgy carbs, going to bed on a full stomach and not getting horizontal fast enough when coming from watch (or changing below to get on watch) can bring it on in the most susceptible. The trick is to get to bed fast when going off watch and get to deck fast (dressed and kitted of course) when coming on watch. Fresh air and watching the horizon helps. Don't get too hot or too cold and sip water and nibble food regularly and you'll be fine. What are the Symptoms? Having sailed for 25 years or more, my general experience of the sea sick is that sufferers normally go quiet for a while first, then pale and sometimes they become cold and clammy. A friend of mine once went an unbelievable green and then deep deep purple. He looked rather like he'd been in a ring with Mike Tyson in a bad mood. It was a sight to behold and, in an uncharitable way, even quite amusing - for me at least. Needless to say, he was a very very old friend. I'm much nicer with training crew..ahem. Sufferers become lethargic and sometimes unsteady on their feet. They can also feel bloated and queasy. Sounds fun so far, right? Thankfully sea sickness isn't life threatening although they do say that the stages of sea sickness start with the sufferer fearing he's so ill he's actually going to die and then, after several hours, comes the awful realisation that in fact, he might not. Don't confuse sea sickness with hypothermia, a much more serious condition and, of course, being sick at sea might be a symptom of something else, so treat a sufferer like any other casualty once they become overcome by the symptoms and unable to function properly under their own steam. Many will never feel anything but just a bit queasy. However, especially if it is rough or you are spending extended times below decks, perhaps doing chart work or cooking, you might become nauseous and vomit. If you start, it's likely that you will soon feel unsteady on your feet and lose strength quite quickly once you are fully gripped by it, especially if you are not eating and drinking. But you can come back from it and some are much better after a quick 'tactical chunder'. It's up to you. What can I do if I get it? Most only ever feel 'a bit nauseous' but if it is rough you might actually have need to call over the side for 'Uncle Ralph' once or twice. Again, this is very personal to the sufferer, but most feel better right after. Some 'puke and play', carrying on as normal, some collapse in a heap of misery. Whilst there is some element of strength of character at play here (and adrenaline plays its part too), I really believe that some people just suffer more. It's not always something you can just power through. I have seen a World Class pro 'Cage Fighter' that knows about physical discomfort and managing it just crumble because of sea sickness. He later admitted he'd thought he could just power through, and he did try, but eventually it wore him down. He was the first to admit he had to find a way to manage it - and he did. Try and be brave if you are unfortunate enough to suffer. But if you try your best and have to stop, that's fine. After all, we want you on deck learning, not in your bunk being sick, so try and manage your body early and look after yourself. To anyone that sails, a crew member with sea sickness is no big deal. Throwing up in front of strangers isn't most people's idea of a fun day out but please don't be embarrassed. We've seen it all before. Take it from a man that has been puked on by many. Of course, I'd rather you didn't add to the tally, so please try and control your trajectory. Don't be embarrassed but do try and be considerate of others. If you get sick bad it can be very debilitating. That does not mean you can abdicate all responsibility for hygiene and social decorum, no matter how ill you might feel, try to plan where you puke! I don't enjoy being puked on any more than the next man. If on deck - clip on (of course) and try not to vomit into the wind - it is never a good idea and you'll only try it once. Helming is a good way to get rid of sea sickness. It gives you something to think about and it connects you with the motion of the boat. If all else fails, ask to go below and get horizontal in your bunk. Get warm and comfy and you should start to feel better. Take a bottle of water and some paper towel and a bucket just in case! If below and using a bucket, make sure it is passed to deck to be disposed of to avoid an unpleasant aroma gathering below. Top tip: Best warn the deck what's in the bucket! Most skippers like sufferers to be near the wheel somewhere so they can keep an eye on them - or lying down flat, securely in their bunk, with a bucket, a bottle of water and a warm sleeping bag. Hopefully some kind person will come and check on you every now and again. Try and stay hydrated and warm and don't be tempted to stay on deck on your off watch! You must go below or you'll become cold and dehydrated. Then your problems really start! There are a variety of pills and patches and wristbands available to the susceptible. Patches are quite good but very strong and all have side effects. Check restrictions on use. Ginger and flat cola are considered to be good for the symptoms. Some people use sea bands and some use tablets which you can get from any pharmacy. Whatever pills you take, take them at least 12 hours before you start sailing. If you start taking them late they'll have no time to work. Obviously, if you start vomitting, the tablets will stop working. That's when patches seem a good idea. Double vision, dry mouth and drowsiness are all symptoms of the remedies, so read the box carfeully. Remember, most people are not sea sick, especially in normal conditions. The most reliable way to avoid sea sickness is to stand under an oak tree. However, next best you can try wrist pressure bands, motion sickness tablets or patches. Ginger is said to help and flat coke too. Patches are good because you can't throw them up - worth considering. If you take pills, take them at least 12 hours before you sail, so the night you arrive on the boat before on a training course. If you wait until you feel ill, it's almost certainly too late. The patches are sold under various brands but I think Dramamine is the main brand. It is strong and does have side effects. As with ALL medication, read the labels before taking and if unsure, consult your doctor. |
The Author
(kneeling)
Mark Burkes is a former Clipper Race Skipper, a round the world crew member, Clipper Training Skipper & jobbing RYA Yachtmaster Instructor. He has over 250,000 miles logged.
Mark also writes professionally both online and offline and has written for Yachting World. ADVICE BY TOPIC
All
Fierce Turtle is not linked to nor is it in any way accredited by the splendid folk at Clipper Ventures. All opinion is my own.


Archives
July 2023


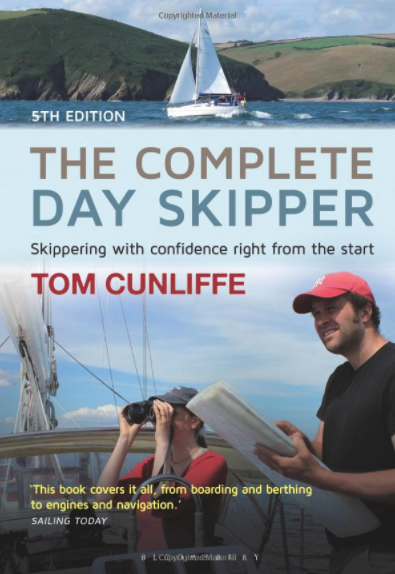
Buy it now on Amazon!

A must-read for Clipper Crew!

This blog is entirely free. However, if you'd like to make a small contribution towards web hosting costs it'd be very much appreciated.
|
||||||||||||||||||||||||||||||||||||||||||||||||||||||||||||
 RSS Feed